Activity Activity 是用户可以执行的单一任务。负责创建新的窗口,供应用绘制和从系统中接收事件。
Activity 是用 Java 编写的,扩展自 Activity 类。
Activity 会创建视图来向用户显示信息,并使用户与 Activity 互动。视图是 Android UI 框架中的类。它们占据了屏幕上的方形区域,负责绘制并处理事件。Activity 通过读取 XML 布局文件确定要创建哪些视图(并放在何处)。这些 XML 文件存储在标记为 layouts 的 res 文件夹内。
参阅Activity Google官方文档
布局 XML Android 项目中的布局在 res/layouts 目录下的 XML 文件编写。
示例 1 2 3 4 5 6 7 8 9 10 11 <TextView android:id ="@+id/hello" android:layout_width ="wrap_content" android:layout_height ="wrap_content" android:text ="Hello World!" /> <Button android:id ="@+id/button" android:layout_width ="wrap_content" android:layout_height ="wrap_content" android:text ="确定" />
常用控件
属性
定义
TextView
显示文本信息
Button
按钮
EditText
文本编辑框
ImageView
图片
ProgressBar
进度条
AlertDialog
弹出对话框
ProgressDialog
弹出带进度条的对话框
常用控件属性
属性
定义
android:id
ID值
android:layout_width
控件宽度
android:layout_height
控件高度
android:text
控件显示的文字
android:gravity
文字对齐方式
android:textSize
文字大小
android:textColor
文字颜色
android:src
引用资源
android:padding
内边距
android:margin
外边距
更多控件请查阅:官方文档
关于颜色,可以到 Materia Design 官网选取颜色
几种基本布局 线性布局(LinearLayout) 一种依靠线性方向排列的布局。
1 2 3 4 5 6 7 8 9 10 11 12 13 14 15 16 17 18 19 20 21 22 23 24 25 26 27 <?xml version="1.0" encoding="utf-8" ?> <LinearLayout xmlns:android ="http://schemas.android.com/apk/res/android" xmlns:tools ="http://schemas.android.com/tools" android:layout_width ="match_parent" android:layout_height ="match_parent" android:orientation ="vertical" android:padding ="16dp" tools:context ="com.example.android.exampleapp.MainActivity" > <EditText android:id ="@+id/edit_text_name_input" android:layout_width ="match_parent" android:layout_height ="wrap_content" android:background ="@color/colorAccent" android:hint ="Enter your name" android:padding ="4dp" android:textSize ="24sp" /> <TextView android:id ="@+id/text_view_name_display" android:layout_width ="wrap_content" android:layout_height ="wrap_content" android:layout_gravity ="center" android:layout_marginTop ="8dp" android:text ="Your name appears here" android:textSize ="30sp" /> </LinearLayout >
相对布局(RelativeLayout) 一种依靠相对关系排列的布局。
控件可以用android:layout_above="@id/other_widget"之类的语句来定位。
相对布局属性:
相对控件属性
描述
android:layout_above
位于给定DI控件之上
android:layout_below
位于给定DI控件之下
android:layout_toLeftOf
位于给定控件左边
android:layout_toRightOf
位于给定控件右边
android:layout_alignLeft
左边与给定ID控件的左边对齐
android:layout_alignRight
右边与给定ID控件的右边对齐
android:layout_alignTop
上边与给定ID控件的上边对齐
android:layout_alignBottom
底边与给定ID控件的底边对齐
android:layout_alignBaseline
对齐到控件基准线
相对父容器属性
描述
android:layout_alignParentLeft
相对于父靠左
android:layout_alignParentTop
相对于父靠上
android:layout_alignParentRight
相对于父靠右
android:layout_alignParentBottom
相对于父靠下
android:layout_centerInParent
相对于父即垂直又水平居中
android:layout_centerHorizontal
相对于父即水平居中
android:layout_centerVertical
相对于父即处置居中
版本4.2以上相对布局新属性
描述
android:layout_alignStart
将控件对齐给定ID控件的头部
android:layout_alignEnd
将控件对齐给定ID控件的尾部
android:layout_alignParentStart
将控件对齐到父控件的头部
android:layout_alignParentEnd
将控件对齐到父控件的尾部
帧布局(FrameLayout) 默认摆放在左上角的布局。
在下面的例子中, FrameLayout嵌套了ScrollView
1 2 3 4 5 6 7 8 9 10 11 12 13 14 15 16 <FrameLayout xmlns:android ="http://schemas.android.com/apk/res/android" android:layout_width ="match_parent" android:layout_height ="match_parent" > <ScrollView android:layout_width ="match_parent" android:layout_height ="wrap_content" > <TextView android:id ="@+id/tv_toy_names" android:layout_width ="wrap_content" android:layout_height ="wrap_content" android:padding ="16dp" android:textSize ="20sp" /> </ScrollView > </FrameLayout >
约束布局(ConstraintLayout) Android Project默认采用的布局。功能强大。
1
2
3
4
5
6
7
8
9
10
11
12
13
14
15
16
17
18
19
20
21
22
23
24
25
26
27
<?xml version="1.0" encoding="utf-8" ?> <android.support.constraint.ConstraintLayout xmlns:android ="http://schemas.android.com/apk/res/android" xmlns:app ="http://schemas.android.com/apk/res-auto" xmlns:tools ="http://schemas.android.com/tools" android:layout_width ="match_parent" android:layout_height ="match_parent" tools:context ="com.jerrysheh.sunshine.MainActivity" > <TextView android:id ="@+id/hello" android:layout_width ="wrap_content" android:layout_height ="wrap_content" android:text ="Hello World!" app:layout_constraintBottom_toBottomOf ="parent" app:layout_constraintLeft_toLeftOf ="parent" app:layout_constraintRight_toRightOf ="parent" app:layout_constraintTop_toTopOf ="parent" /> <Button android:id ="@+id/button" android:layout_width ="wrap_content" android:layout_height ="wrap_content" android:text ="确定" /> </android.support.constraint.ConstraintLayout >
更多布局相关请查阅:
- 官方文档1 - 官方文档2
自定义布局 如果系统自带的布局和控件不够用,我们可以自定义布局。
先在 res/layout 下面新建一个布局文件,如 title.xml, 然后编写我们的布局。再然后在main_activity.xml中加入<include layout="@layout/title" />,就能把我们的布局引进来。
XML 布局与 Java Activity 的关系 创建 XML 布局后,你需要将其与你的 Activity 相关联。
你可以在 Activity 的 onCreate 方法中使用 setContentView 方法进行关联。你可以以 R.layout.name_of_layout 的形式引用布局文件。例如,如果你的布局名称为 activity_main.xml,则如下所示:
1 2 3 4 5 6 7 8 9 public class MainActivity extends AppCompatActivity { @Override protected void onCreate (Bundle savedInstanceState) { super .onCreate(savedInstanceState); setContentView(R.layout.activity_main); } }
什么是 R.layout ? 当你的应用被编译时,系统会生成 R 类。它会创建常量,使你能够动态地确定 res 文件夹的各种内容,包括布局。
详细可参阅资源 的文档。
setContentView 是干什么的 setContentView 它会扩展布局。本质上是 Android 会读取你的 XML 文件并为你的布局文件中的每个标记生成 Java 对象。然后,你可以在 Java 代码中通过对 Java 对象调用方法修改这些对象。
资源 每个 Android 项目都包含一个 res 目录。这是放置图片、字符串和布局等的地方。
在 XML 和 Java 中使用资源 在上一篇中提到,setContentView(R.layout.activity_main)表示 java 引用了 activity_main.xml 这个xml资源。
可以在 res/value/string 中声明一些资源文件,如
1 2 3 <resources > <string name ="app_name" > Github Query</string > </resources >
然后在java中
1 2 String myString = getString(R.string.app_name);
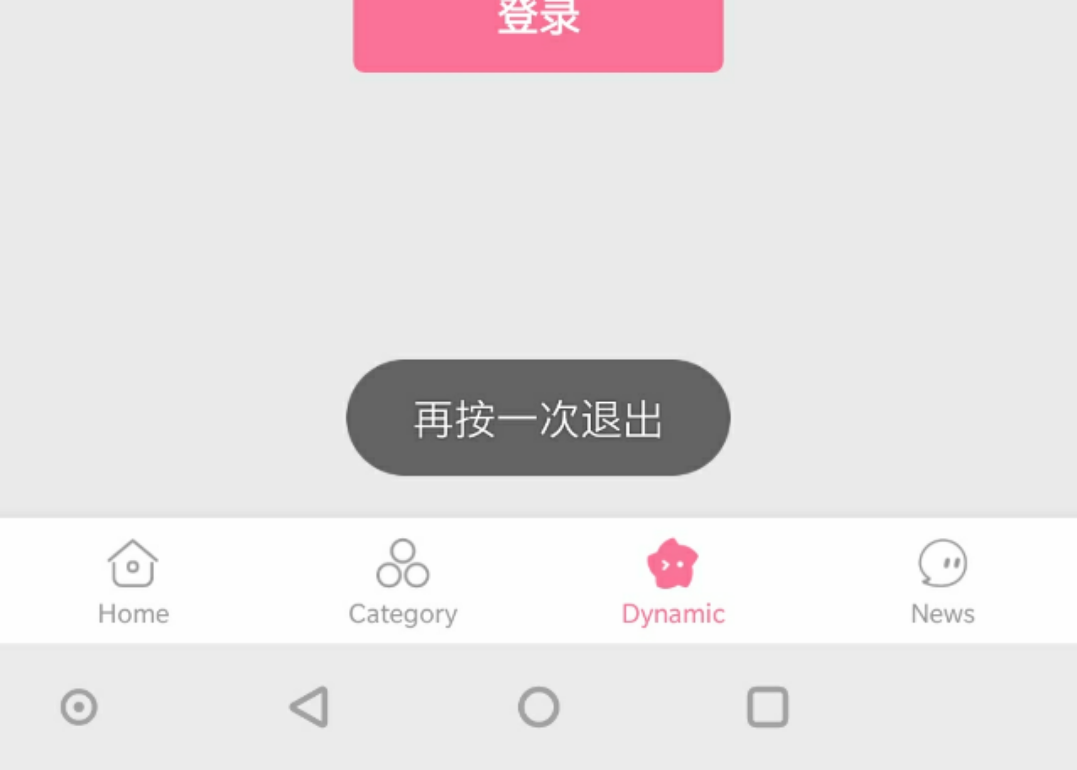
使用Toast Toast是一种显示在屏幕下方的提示,我们经常可以看到有时候app会提醒你没有联网,或者再按一次返回键退出应用之类,这些提醒在短时间内消失,不会打扰用户。
假设我们已经在 xml 里添加了一个 button
然后转到MainActivity.java,重写onCreate方法
1 2 3 4 5 6 7 8 9 10 11 12 @Override protected void onCreate (Bundle savedInstanceState) { super .onCreate(savedInstanceState); setContentView(R.layout.activity_main); Button buttonOK = (Button) findViewById(R.id.toast_button); buttonOK.setOnClickListener(new View .OnClickListener() { @Override public void onClick (View view) { Toast.makeText(MainActivity.this , "yeah, you click it" , Toast.LENGTH_SHORT).show(); } }); }
先实例化一个Button类型的变量 buttonOK,用findViewById指向button的ID
调用buttonOK的setOnClickListener,传入一个点击事件监听器
重写监听器的onClick方法为调用Toast.makeText
Toast.makeText有3个参数,第一个是活动本身,第二个是提示内容,第三个是Toast的长度
最后.show() 让Toast显示出来
Toast单例 如果点击很多次按钮,会创建很多个 Toast 重叠在一起,可以封装成工具类,使之只有一个实例
1 2 3 4 5 6 7 8 9 10 11 12 13 14 15 16 17 18 19 20 21 22 23 24 25 26 27 public class ToastUtil { private static Toast toast; public static void showToast (Context context, String content) { if (toast == null ) { toast = Toast.makeText(context, content, Toast.LENGTH_SHORT); } else { toast.setText(content); } toast.show(); } public static void showToast (Context context, int resId) { showToast(context, (String) context.getResources().getText(resId)); } }
在 res 新建文件夹 menu , 在 menu里面新建 MenuResource file, 命名为 menu.xml,内容如下
1 2 3 4 5 6 7 8 9 10 11 <?xml version="1.0" encoding="utf-8" ?> <menu xmlns:android ="http://schemas.android.com/apk/res/android" > <item android:orderInCategory ="1" android:id ="@+id/add_item" android:title ="Add" /> <item android:id ="@+id/remove_item" android:title ="Remove" /> </menu >
使用 android:orderInCategory="1" 来对菜单项进行排序
使用 app:showAsAction="ifRoom" 固定到顶栏而不是右上角三个点里面
如果顶栏空间不够,这个item依然会显示到三个点里面进去。使用 app: 而不是 android: 的原因是兼容低版本Android
这样我们就布局了两个按钮,一个 add , 一个 remove
然后在 MainActivity.java 里 重写onCreateOptionsmenu方法和onOptionItemSelected方法,如下
1 2 3 4 5 6 7 8 9 10 11 12 13 14 15 16 17 18 19 20 21 @Override public boolean onCreateOptionsMenu (Menu menu) { getMenuInflater().inflate(R.menu.main, menu); return true ; } @Override public boolean onOptionsItemSelected (MenuItem item) { switch (item.getItemId()) { case R.id.add_item: Toast.makeText(this , "added" , Toast.LENGTH_SHORT).show(); break ; case R.id.remove_item: Toast.makeText(this ,"removed" ,Toast.LENGTH_SHORT).show(); break ; default : Toast.makeText(this ,"nothing" , Toast.LENGTH_SHORT).show(); } return true ; }
onCreateOptionsmenu方法根据R.menu.main找到我们的布局
onOptionsItemSelected方法根据id定义了每个按键按下后的动作
实践:从界面到逻辑 现在我们有很多个String,我们想把这些 String 放到一个activity里,然后在 Android 设备上显示出来。由于 String 很多,一屏不够显示,因此需要实现可以滑动屏幕上下滚动的功能。
1. 编辑布局 首先我们在 activity_main.xml 中编辑好界面布局
1 2 3 4 5 6 7 8 9 10 11 12 13 14 15 16 17 18 <?xml version="1.0" encoding="utf-8" ?> <FrameLayout xmlns:android ="http://schemas.android.com/apk/res/android" android:layout_width ="match_parent" android:layout_height ="match_parent" > <ScrollView android:layout_width ="match_parent" android:layout_height ="wrap_content" > <TextView android:id ="@+id/tv_toy_names" android:layout_width ="wrap_content" android:layout_height ="wrap_content" android:padding ="16dp" android:textSize ="20sp" /> </ScrollView > </FrameLayout >
这个界面有一个ScrollView,用于滚动显示内容。ScrollView里面是一个TextView,用于显示文字。
如果用到了一些 support 库的界面,记得去 app/build.gradle 中的 dependencies 闭包中添加支持。
2. ToyBox.java 现在我们在 app/src/main/java/[包名]/ 里创建一个类,这是一个String数组,里面有很多String。
方法getToyNames返回了这个String数组。
1 2 3 4 5 6 7 8 9 10 11 12 13 14 15 16 17 18 19 20 21 22 23 24 25 26 27 28 29 30 31 32 33 34 35 36 37 38 39 40 41 42 43 44 45 46 47 48 49 50 51 52 53 54 public final class ToyBox { public static String[] getToyNames() { return new String [] { "Red Toy Wagon" , "Chemistry Set" , "Yo-Yo" , "Pop-Up Book" , "Generic Uncopyrighted Mouse" , "Finger Paint" , "Sock Monkey" , "Microscope Set" , "Beach Ball" , "BB Gun" , "Green Soldiers" , "Bubbles" , "Spring Toy" , "Fortune Telling Ball" , "Plastic Connecting Blocks" , "Water Balloon" , "Paint-by-Numbers Kit" , "Tuber Head" , "Cool Ball with Holes in It" , "Toy Truck" , "Flying Disc" , "Two-Handed Pogo Stick" , "Toy Hoop" , "Dysmorphia Doll" , "Toy Train" , "Fake Vomit" , "Toy Telephone" , "Barrel of Primates" , "Remote Control Car" , "Square Puzzle Cube" , "Football" , "Intergalactic Electronic Phasers" , "Baby Horse Dolls" , "Machines that turn into other Machines" , "Teddy Bears" , "Shaved Ice Maker" , "Glow Stick" , "Squirt Guns" , "Miniature Replica Animals Stuffed with Beads that you swore to your parents would be worth lots of money one day" , "Creepy Gremlin Doll" , "Neodymium-Magnet Toy" }; } }
3. MainActivity.java 一开始这个MainActivity.java只有初始化代码:
1 2 3 4 5 6 7 8 9 10 11 12 13 package com.example.android.favoritetoys;import android.os.Bundle;import android.support.v7.app.AppCompatActivity;public class MainActivity extends AppCompatActivity { @Override protected void onCreate (Bundle savedInstanceState) { super .onCreate(savedInstanceState); setContentView(R.layout.activity_main); } }
修改如下
导入android.widget.TextView;包,Android Studio会自动为我们做。
声明一个TextView类型的变量mToysListTextView。
用findViewById方法,让mToysListTextView指向ID为tv_toy_names的TextView。
声明一个 String[] ,存放上面提到的很多String
一个eachfor循环,分别存放每一个String
1 2 3 4 5 6 7 8 9 10 11 12 13 14 15 16 17 18 19 20 21 22 23 24 package com.example.android.favoritetoys;import android.os.Bundle;import android.support.v7.app.AppCompatActivity;import android.widget.TextView;public class MainActivity extends AppCompatActivity { private TextView mToysListTextView; @Override protected void onCreate (Bundle savedInstanceState) { super .onCreate(savedInstanceState); setContentView(R.layout.activity_main); mToysListTextView = (TextView) findViewById(R.id.tv_toy_names); String[] toyNames = ToyBox.getToyNames(); for (String toyName : toyNames) { mToysListTextView.append(toyName + "\n\n\n" ); } } }
最终效果如下: